Saturday, April 26, 2014

~Grilled Swordfish~

Daffodils facing the sun!
The bright yellow Daffodils are blossoming in our front cut-out!  Golden forsythias stand out in our backyard.  It's Spring and yesterday it felt mighty fine to be outdoors without a jacket!  Yes, I did write without a jacket!  Another quick look into our backyard and our grill is spotted.  It's been a tease during the harsh winter months just sitting on the side of our deck - covered - waiting to be used.   

Yesterday, the lid of the shiny grill was opened and a Swordfish Steak was placed on the grill.  Swordfish has been a fave of mine way back from my childhood.  The only way my mom prepared it was using the broiler.  However, I've learned that Grilled Swordfish is absolutely delicious!  And it requires little clean-up after dinner.

I've posted my method for grilling Swordfish in the past.  After totally enjoying this grilled fish along with a veggie salad & a microwaved "baked" potato, I decided to share it once again.  So good! 

Grilled Swordfish
(File Photo)
Grilled Swordfish

Ingredients:
1 lb. Swordfish Steak
Olive Oil
Paprika - about 2 shakes from the bottle

Method:
  1.  Preheat outdoor grill.
  2.  Pour about 2 Tablespoons Olive Oil on a large dish.
  3.  Sprinkle a little Paprika on top of Olive Oil.
  4.  Rinse Swordfish Steak under cold running water.
  5.  Place on Olive Oil/Paprika in dish.
  6.  Turn Swordfish over to coat other side.
  7.  Place on heated grill and put grill cover down.
  8.  Grill for 7 minutes and 30 seconds.  
  9.  The fish is turned over & grill other side for 7 minutes and 30 seconds.
 *** The amount of needed grilling time depends on the size of the piece of Swordfish Steak and the grill.  Using our gas grill turned up 3/4 heat a 1 lb. piece requires 7 minutes and 30 seconds on each side.  The cover is down while grilling.

Do you enjoy grilled seafood?

Enjoy!
Yummy!

Friday, April 18, 2014

Strawberry Shortcake

Recipe ready to be used!
Lots of excitement in our family, so I haven't posted in a bit!  The beautiful celebration had been in the planning stages for more than a year.  Our wonderful younger son married his awesome fiancee and we are so happy to welcome her into our family!  A beautiful outdoor ceremony in upstate NY followed by an absolutely great indoor reception.  The weather, the ceremony and the celebration were all - perfect!   

After spending the 3 day weekend with family & friends, suddenly Easter is here.  No, I had not given Easter dinner much thought.  Mustard Roasted Leg of Lamb is now on the menu complete with all of the trimmings.  Dessert???

Strawberry Shortcake!  It comes in quite handy for me to check out my own blog for foodie ideas!  :)  Strawberry Shortcake is definitely a family fave!  Fresh sliced strawberries or in my case - I reach into our large freezer & locate a package of the frozen sliced slightly sweetened strawberries that only need to be defrosted.  Today 2 packages of the frozen strawberries will be placed in the fridge to defrost - ready for Sunday.

The Shortcake will be prepared tomorrow in a 9" round cake pan.  Vanilla Ice Cream & Whipped Cream have been purchased, so we are good to go!  This is a very easy, very delicious dessert!

Strawberry Shortcake
     printable recipe 

Oven: 450°F    Time:  15 – 20 minutes

***Strawberries & Shortcake are needed for this amazing dessert!

Ingredients for Shortcake:

2 Cups Flour 
2 Tablespoons Sugar
3 teaspoons Baking Powder
1 teaspoon Salt
1/3 Cup solid Crisco Shortening
1 Cup Milk (can be low fat, reconstituted powdered or soy)

Method: 
  1. Heat oven to 450°. 
  2. Spray 9" round layer cake pan with PAM. 
  3. Measure Flour, Sugar, Baking Powder & Salt into a mixing bowl. 
  4. Add solid Shortening.
  5. Combine Shortening with dry ingredients using 2 knives or a pastry blender.
  6. Stir in Milk until blended. 
  7. Spoon & pat into pan. 
  8. Bake 15 – 20 minutes until golden brown. 
  9. Cool. 
  10. Before serving, cut into pie slices.
  11. Then cut each serving to be used in half – a top and a bottom.
  12. Place the bottom in a dessert dish. Cover with sliced strawberries (that have been cleaned, sliced and mixed with a little sugar, according to taste) & ice cream. 
  13. Place other piece on top and cover with berries & ice cream. 
  •  Any extra shortcake slices can be sliced and frozen to be enjoyed at a later date.

This is an easy, tasty dessert to be enjoyed in the Spring!

Enjoy!
Yummy!


Happy Easter!!!


Friday, April 4, 2014

Chicken Curry

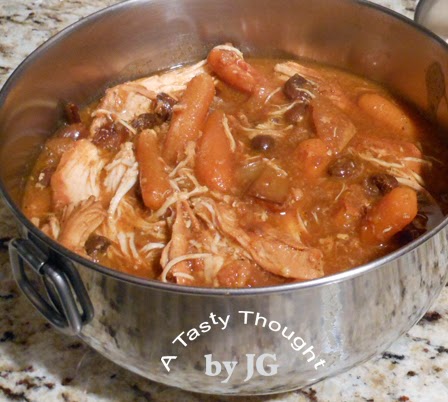
Chicken Curry
My Slow Cooker is used so often!  I enjoy the quick prep time and also the great aroma that floats from my kitchen for a few hours while my slow Cooker is working.  Last week a Slow Cooker/ Crock Pot recipe caught my eye when I scrolled on McCormick's site.  A Slow Cooker Chicken Rice Curry recipe!  Chicken is a staple here, so I kept reading.  An apple - nice!  Raisins - I was definitely hooked.  The next day we totally enjoyed Chicken Curry served over Rice.  "Rice is Nice" and this is my fave method to cook Rice.

There were changes going on when I prepared this yummy entree:
  • I really don't like instant rice, unless I'm using my MIL's Rice Pudding recipe, that uses instant rice.  For that reason, I did not follow the McCormick recipe exactly.
  • My Slow Cooker has a teflon coating, so I usually place washed baby carrots in the bottom of the pot in many slow Cooker recipes.  The carrots prevent the meat (chicken here) from drying out on the bottom.  Can you tell that I once had a bad experience?  An added plus:  Those nutritious very tender carrots tasted so good here.
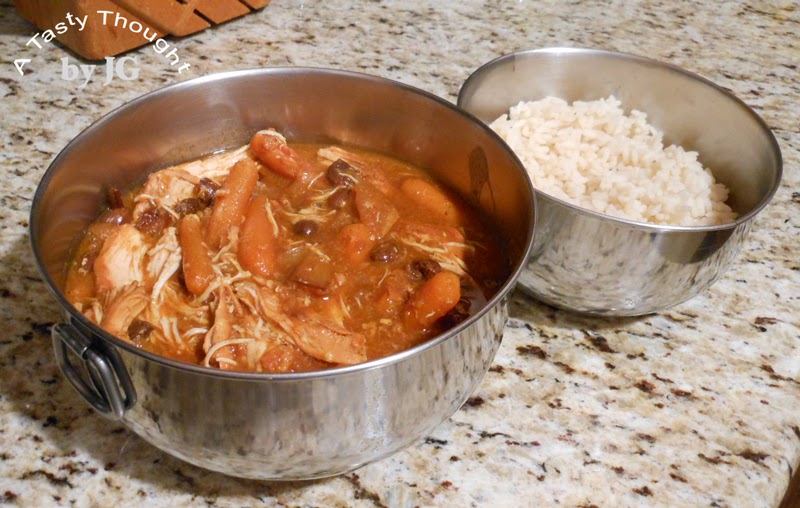


Extra portions to be placed in my fridge
In my photos the fluffy Rice is not plated with this yummy steaming flavorful Chicken Curry on top.  The aroma was so enticing - we could not wait for me to take out my camera and focus.  The extra portions shown above were covered with foil and refrigerated.  The Rice & Chicken Curry were reheated 2 nights later for another yummy dinner!  Sooo goood!

The Raisins & the unpeeled Apple cut into chunks added with the Curry Powder taste so good!  The carrots pick up a little sweetness, too.

Chicken Curry with Rice
                                            inspired by McCormick 

Ingredients:
1 (16 ounce) pkg. rinsed Baby Carrots
2 lbs. boneless skinless Chicken Breasts
2 Bay Leaves
1 large Apple cored & cut into chunks - Cortland or Empire
1/4 Cup Raisins

1 Tablespoon Curry Powder
1 teaspoon Paprika
1/2 teaspoon Garlic Powder
1 Tablespoon dehydrated Onions

*  *  *
2 ounces Water
3 Tablespoons Flour
1 can (14.5 ounces) Chicken Broth
         (I use Fat Free/Lower Sodium Broth.)

Method:
  1. Spray Slow Cooker pot with PAM.
  2. Wash Baby Carrots & place on bottom of Slow Cooker pot.
  3. Rinse Chicken Breasts under cool running water & place on Carrots.
  4. Add 2 Bay leaves.
  5. Wash Apple.  Core & cut into chunks.  Add on top of Chicken.
  6. Sprinkle on Raisins.
  7. Add Curry Powder, Paprika & Garlic Powder.
  8. Sprinkle on Dehydrated Onions.
  9. In a bowl, combine Water, Flour & 1/4 Cup Chicken Broth.  Stir until smooth.
  10. Add remaining Broth to bowl, stir.
  11. Add Water, Flour, Broth combo to Slow Cooker pot.
  12. Place lid on top.
  13. Set temperature to HighCook for 4 hours.
  14. Start preparing the Rice about 40 Minutes before turning off the Slow Cooker.  Click for Recipe
This is absolutely delicious!  Take your Slow Cooker/ Crock Pot out and make this entree.  Full of flavor and very tender!

Enjoy!
Yummy!