Showing posts with label Garlic Powder. Show all posts

Thursday, September 18, 2014

Roasted Zucchini/ Summer Squash

Where's the photo?!?
Sometimes there's just not a photo!  Those are the times when we are either famished or I just forget to take out the camera or the iPhone.  Last night was one of those times.

It was a very quick dinner.  Those frozen Crabcakes do come in handy!  Crabcakes with tartar sauce are always so good on a sesame seed bun.  You know the ole' combo- 1 Tablespoon Sweet Relish with about 1/2 teaspoon Mayonnaise & stir.  Making the Tartar Sauce was easy, but we also needed a veggie.  No, not French Fries.  Opening the fridge & looking down to the veggie bin, 2 Zucchini + 1 Summer Squash popped into view!  Roasted veggies are always so yummy, so I had my answer.  Roast the sliced veggies in the same cookie pan & at the same temperature as the Crabcakes while they were baking!  Now that our temps are a lot cooler, heating the oven & kitchen actually feels great!  During the HHH summer months I really do not do much baking!  

Roasted Zucchini + Summer Squash
     2 - 3 servings

2 Zucchini
1 Summer Squash

or 1 Zucchini + 2 Summer Squash

Method:
  1. Wash veggies under cool running water, dry.
  2. Cut into 1/2" slices.
  3. Using a container or Ziploc Bag, combine 2 Tablespoons Olive Oil + 1/8 teaspoon Oregano & 1/8 teaspoon Garlic Powder.
  4. Add veggie slices to bag & coat.
  5. Place coated veggies on cookie pan.  I placed them surrounding the Crabcakes
  6. Roast 20 Minutes at 450°F.
Zucchini & Summer Squash were added to my list to purchase at the roadside stand today.  I'll definitely be roasting these again as long as our local veggies are available!   :)  Try it!

Enjoy!
Yummy!
 

Sunday, January 26, 2014

Slow Cooker Chicken Chili

Chicken Chili
During the frigid winter, mentioning the food Chili always brings visions of hot steaming bowls of a thick red comfort food served in a bowl.  Two days ago in my pantry I located red kidney beans.  I had plum tomatoes. Chicken was in the fridge.  It was the great opportunity to take out my Chicken Chili recipe!

This is a great meal to prepare in a Slow Cooker or in a Crock Pot.  I remember finding a variation of it originally in "some" magazine a few years ago when I was writing (typing) a cookbook with easy recipes for my son.  It was the summer after he graduated from college.  That summer a crash course in food & food safety took place in our kitchen.  After coming home from his summer job in the evening, he & I whipped up dinners.  As a mom I needed to know that he had some kitchen experience - before he started the next phase of his education that September.  After all, he could not eat out all the time.  It worked well!  Now, I smile when he & his family are visiting "back home" and he asks if he can help in the kitchen.  :) The answer is always "Yes"!

My younger son learned his basic cooking skills using the same method.  I had compiled 2 cookbooks 3 years earlier.  Whenever he is "back home" he is our "Garlic Mashed Potatoes" guy.  :)  Nice!

Slow Cooker Chicken Chili 

Ingredients:
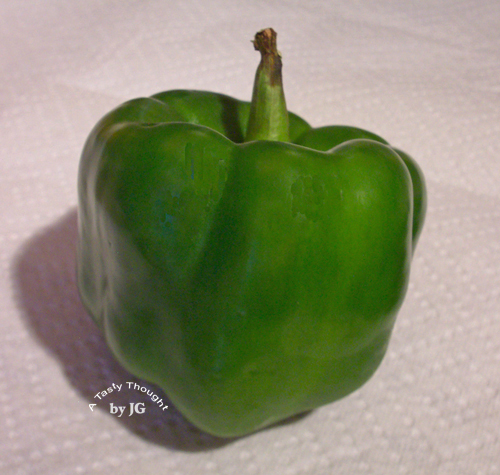
1 Green Pepper, cut into strips
1- 1 and 1/2 lbs. Boneless Skinless Chicken Breasts
1 Cup sliced Okra - Optional (I use frozen & defrosted.)
1 Tablespoon Dehydrated Onion
1 Tablespoon Dehydrated Parsley
2 cans 14 oz. Red Kidney Beans, drained, rinsed & drained again
1 can Plum Tomatoes - 15- 22 oz. - drained & cut into chunks
2- 3 teaspoons Chili Powder
1/2 teaspoon Garlic Powder
1 teaspoon Cumin
1 teaspoon Oregano
1 can 14.5 oz. Chicken Broth (Low Sodium, Low Fat)
3 Tablespoons Flour

Sometimes 8 oz. Tomato Sauce is added to the pot before placing the lid on top.

Method:
  1. Place Pepper Strips in Slow Cooker Pot.
  2. Add Boneless Skinless Chicken Breasts on top.
  3. Top with sliced Okra.
  4. Sprinkle on Onion & Parsley.
  5. Add Red Kidney Beans.
  6. Top with Tomato Chunks.
  7. Sprinkle on Chili Powder, Garlic Powder, Cumin & Oregano.
  8. In small bowl blend 3 Tablespoons Flour with about 1 Cup Chicken Broth until smooth.
  9. Add remaining Broth to bowl & blend together.
  10. Pour liquid over ingredients in Slow Cooker.
  11. Add Cover.
  12. Cook on High for 3 and 1/2 hours.  Reduce to Medium for 1/2 hour.
  13. Before serving, stir Chili.  The tender Chicken breaks into smaller pieces.
  14. Ladle into soup bowls. 
  15. Enjoy with a dollop of low fat sour cream & rye bread.
After enjoying a delicious dinner containing Okra at the Okra Grill in Mount Pleasant, SC a few years ago, I use Okra in some recipes.  It's a great addition to my Slow Cooker Chicken Chili, so a package of sliced Okra is always on hand in my freezer.

A steaming bowl of Chicken Chili at dinner tastes great during our long lasting "cold snap"!  The remaining portions are in our fridge.  The seasonings in the Chili are absorbed by the other ingredients.  Yes, sometimes Ziploc Freezer Containers of this yummy "comfort food" is placed in the freezer.   
  
We will Enjoy again!
Yummy!
        

Friday, February 1, 2013

Super Bowl Chili

Super Bowl Chili
Super Bowl Sunday!  The time to get comfy and watch the commercials on t.v.!  Oh, definitely, also focus on the game!  We all have our fave team.  Even years before attending my first Boston College Football game, watching football was a weekend fave activity.  My sons were SuperFans watching their BC Eagles in Alumni Stadium during home games.  Parent Weekends were great!  The tradition lives on, attending games and also following the careers of former BC football players in the Pros!

This Sunday we'll be enjoying the big game.  My West Bend Slow Cooker will be put to work... Chili is on the menu.  Yummy!  Placing the ingredients in the Slow Cooker's pot, adding the cover, setting the temperature to High later reducing to Medium...dinner will be so tasty & it will cook itself!   

(Usually, I place one veggie in the Slow Cooker's pot and then add the meat/chicken.  The pot has a nonstick surface, but I use this precaution, so the browned Ground Beef, in this case, will not become crispy on the bottom.  Green Pepper chunks that have been defrosted from my freezer stash are placed on the bottom.)
Cut into chunks before adding to the pot.
Super Bowl Chili is bursting with flavor.  We enjoy it topped with a dollop of Fat Free Sour Cream.  The creamy mild sour cream is a great contrast to the spicy tomato sauce in the Chili ...Yummy!  There will be extra portions...these will be placed in the fridge...reheated & enjoyed on Tuesday.  :) 

Super Bowl Chili  see:  recipe posted 1/17/12

Ingredients:
1 to 1¼  lbs. Ground Beef
1 small Green Pepper, cut into small chunks
(1) 14.5 oz. can Diced Tomatoes, drained
(2) cans Red Kidney Beans (about 19 oz. each)
Chopped Onions (I use 1 Tablespoon dehydrated Onions.)
Chopped Parsley (I use 1 Tablespoon dehydrated Parsley.)
2- 3 teaspoons Chili Powder
1/2 teaspoon Garlic Powder
1/2 teaspoon Oregano
(2) cans Tomato Sauce (15 oz. each)
≈  ≈  ≈  ≈  ≈  ≈
Fat Free Sour Cream - add when serving
Rye Bread - for dunking

Method:
  1. Spray nonstick cooking pot of Slow Cooker with PAM.
  2. Brown Ground Beef in a frying pan.
  3. Place Green Pepper chunks in cooking pot.
  4. Add browned Ground Beef.
  5. Add drained Diced Tomatoes.
  6. Drain Kidney Beans.  Rinse in cold water.  Drain again.
  7. Place on top of Tomatoes.
  8. Sprinkle on desired amount of chopped Onions & chopped Parsley.
  9. Then, sprinkle Chili Powder, Garlic Powder & Oregano on top.
  10. Pour Tomato Sauce over top & spread.
  11. Place lid on top.
  12. Set temperature to High for 2 and 1/2 hours.  Then, reduce to Medium for 1/2 hour.
  13. Stir before serving into bowls. 
A bowl of Chili served with a dollop of Fat Free Sour Cream on top...add in a slice of Rye Bread for dunking...Yummy!

Are you getting ready for Super Bowl Sunday???

Go 49ers!!!
   

Friday, July 6, 2012

Basil Parmesan Toast

It's always great to change things a bit!  Sometimes things change while cooking, because the needed ingredient is not to be found - easily.  Who wants to make that quick trip to the grocery store, when you need it right now?  I sure don't, even though my grocery store is 5 minutes away!  Other times, it's great to substitute and try something different.
Add Basil Before Toasting
That last scenario occurred when I was getting the Parmesan Toast ready to be placed in the Toaster  Oven.  I usually sprinkle Garlic Powder on top.  Well, Basil Parmesan Toast tastes absolutely wonderful!

This is a quick & easy substitute whenever dinner rolls are not at hand. Whenever a partial loaf of bread is not found on my counter, the chances are good that one can be located in my freezer.  This is especially true on these HHH days!  The needed slices can easily be defrosted.  However, I've learned that Hamburger Rolls (split in half) work quite nicely, also!

Basil Parmesan Toast

Ingredients: 

Slices of Bread
Softened Butter/Margarine
Parmesan Cheese
Basil (dried)

***A Toaster Oven is needed!

Method:
  1. Lightly spread softened Butter/Margarine on desired bread slices.
  2. Sprinkle Parmesan Cheese on top.
  3. Then, sprinkle on dried Basil. 
  4. Toast bread slices in a Toaster Oven, as desired.
  5. Cut on a diagonal and serve with dinner.
My fave bread to use is Soft Oatmeal.  This Basil Parmesan Toast is quick & easy to make!  Perfect for a summer meal when it would be great to have rolls with dinner, but there are none to be found!

Enjoy!
Yummy!
  

Tuesday, January 17, 2012

A Chili Weekend

Go team!
It was a great weekend and also cold!  Not ideal for taking a walk, but there were other things on our agenda!   We are always up for watching the Boston College Eagles Men's Basketball team and Saturday afternoon's ACC game brought a W!  That quickly led to the NFL Divisional Playoffs!  Sunday afternoon, again, we watched the Playoffs.  Who had time to think about making dinner???  Sure "take out" could work, but my West Bend Slow Cooker is a great little appliance.  Chili made in the Slow Cooker is so good!  Did I mention so easy?

On Saturday evening during the Saints/49ers game we dined on the delicious hearty Chili that had basically cooked itself, with little help from me.  Then came the game we in MA were waiting for - Tom vs. Tim!  :)  Sunday afternoon we were once again glued to our t.v. screen and also enjoying watching former BC Football players in the Divisional Playoffs.  It's unusual for us to be just glued to the t.v. screen, but the Giants/Packers game took our attention.  Dinner time rolled around - again.  I was planning on a dish with chicken, but time just disappeared.  Ah, fortunately in our fridge just waiting to be reheated for dinner - there it was - the extra delicious Chili

This is a great meal to prep in a Slow Cooker or Crock Pot.  My Slow Cooker has a nonstick surface, yet I do spray it lightly with PAM.  I also brown the Ground Beef before placing it in the cooker's pot to reduce the fat content. 

(Usually I place one veggie on the pot's bottom and then add the meat/chicken I am using.)

After watching all of the games and enjoying ALL of our Chili, there are no photos to share.  I can share that Chili tastes wonderful on a frigid day and it's very easy to prep this family fave!   

Slow Cooker Chili

Ingredients:
1 to 1 and 1/4 lbs. Ground Beef
1 small Green Pepper, cut into small chunks
(1) 14.5 oz. can Diced Tomatoes, drained
(2) cans Red Kidney Beans (about 19 oz. each)
Chopped Onions (I use 1 Tablespoon dehydrated Onions.)
Chopped Parsley (I use 1 Tablespoon dehydrated Parsley.)
2 teaspoons Chili Powder, more if desired
1/2 teaspoon Garlic Powder
1/2 teaspoon Oregano
(2) cans Tomato Sauce (15 oz. each)

Method:
  1. Spray nonstick cooking pot of Slow Cooker with PAM.
  2. Brown Ground Beef in a frying pan.
  3. Place Green Pepper chunks in cooking pot.
  4. Add browned Ground Beef.
  5. Add drained Diced Tomatoes.
  6. Drain Kidney Beans and rinse in cold water.  Drain again.
  7. Place on top of Tomatoes.
  8. Sprinkle on desired amount of chopped Onions & chopped Parsley.
  9. Then, sprinkle Chili Powder, Garlic Powder & Oregano on top.
  10. Pour Tomato Sauce over top & spread.
  11. Place lid on top.
  12. Set temperature to High for 2 and 1/2 hours.  Then, reduce to Medium for 1/2 hour.
  13. Stir before serving into bowls. 
We enjoy our Chili with a dollop of Fat Free Sour Cream on top.  Rye Bread is great for dunking!

Do you Enjoy Chili?
Yummy!
                 

Sunday, August 7, 2011

Summer Chicken

Summer is great!  There is so much color in our gardens.  In our front cut-out perennials and annuals flow together.  Overnight there can be a change as blossoms appear.  This just may be the last season of our current Zinnias.  Every summer I save seeds from the current year's gorgeous blossoms.  After drying the seeds and storing them during the winter they are planted in the spring.  It was a little "iffy" as to how the Zinnias would fare this year, because this is the fourth year that seeds were saved and planted from the original purchased seeds.  But all is well!  More buds are ready to blossom.

One hot afternoon this week we had a craving for Grilled Sockeye Salmon.  Well, a reasonably priced nice piece of "wild caught" Sockeye Salmon was not in the cards.  Breaded Sauteed Chicken Tenderloins quickly found their place on our dinner table that evening.  Now, there were quite a few extra pieces of tenderloins after dinner.  Needless to say, into the fridge they went.  At this time of year there usually is a large green Pepper visible every time I open our fridge's door.  The ingredients for another quick & easy colorful delicious dinner were at hand! WooHoo!


Summer Chicken

Ingredients:
About 1 Cup cut up cooked Chicken Tenderloins/Chicken
1 large Green Pepper cut into strips
2-3 Tablespoons Olive Oil
(1) can Plum Tomatoes (1 lb., 12 oz. can)
1/8 teaspoon each dried Oregano, Sweet Basil & Garlic Powder

Method:
  1. Wash Green Pepper.  Cut into strips.
  2. Saute in Olive Oil in skillet about 4-5 Minutes.
  3. Add drained Plum Tomatoes that have been cut in half.
  4. Cut cooked Chicken Tenderloins into pieces and add to skillet.
  5. Sprinkle 1/8 teaspoon Oregano, Sweet Basil & Garlic Powder over ingredients in skillet.
  6. Heat about 6-8 Minutes, until hot.  Stir occasionally.
The Chicken Tenderloins I used had been coated with Bread Crumbs and sauteed.  As the juicy Plum Tomatoes heated, the Bread Crumbs on the Chicken pieces absorbed the juice.  Dinner was so yummy!    

Today we purchased the Sockeye Salmon.  I noticed the "special" in our Big Y's store flyer on Thursday.  :)

Enjoy!
Yummy!
       

Thursday, January 13, 2011

Garlic Parmesan Toast

Yesterday was definitely a New England winter wonderland!  School children had a "Snow Day".  Some children here in the Pioneer Valley enjoyed another day of sleeping late today.  :)  We were very aware that SNOW would be the word of the week and it sure is!  In the afternoon my Slow Cooker bubbled away containing the ingredients for our warm, hearty, delicious, colorful dinner.  Dinner was a cinch served over Barilla PLUS Farfalle Pasta.  

Only for special occasions do I purchase dinner rolls, so there were not any to dunk into the appetizing herbed tomato sauce containing green pepper slices. 

However, Garlic Parmesan Toast was my plan.  For years my fam has enjoyed this easy substitute for dinner rolls.  A Toaster Oven is a must to prepare these!  The ingredients are always at hand:  Sliced bread, Butter/Margarine, Parmesan Cheese and Garlic Powder.  It is so easy to make and it is so tasty!


Garlic Parmesan Toast 
  1. Spread Butter/Margarine on bread slices.
  2. Sprinkle Parmesan Cheese on top.
  3. Finish by sprinkling with Garlic Powder, as desired.
  4. Toast bread slices in a Toaster Oven, as desired.  
Try these and you will enjoy!  If garlic is not a fav in your fam, Parmesan Toast tastes mighty fine, also!  Just skip the Garlic Powder.  :)  My bread of choice is Soft Oatmeal.  There is always at least a half loaf in my freezer waiting to be used!  This was Plan A! 

Enjoy!
Yummy!
      

Thursday, May 14, 2009

Smells Inviting, Tastes Great!

This past Sunday was Mother’s Day and my hubby was the chef!!! Nice!!! He used our outdoor grill – even better! These days we eat many meals of fish or of chicken, so enjoying Luscious London Broil that he prepared and grilled was totally a treat!

Earlier in the day he prepared the London Broil. (Click here for my printable recipe card with the directions.)

Parsley, Chopped Onion, Garlic Powder, Pepper, Basil, Oregano and (2) Bay Leaves were placed in a Gallon sized Ziploc Bag along with Lemon Juice. After rinsing the meat in cold water, add it into the bag. Carefully, remove the air from the Ziploc Bag and zip. Then place it on a dish and refrigerate the London Broil for at least 3 hours. 5 hours is better. During this time, carefully, turn the bag over at least once and continue refrigerating.

Before dinner heat the grill and then remove the meat from the Ziploc Bag. Place the London Broil on a large plate and spread about 2 TBS. Gulden’s Mustard on top. Place this side down on the hot grill. Carefully, place and spread 2 more TBS. Gulden’s Mustard on the meat side facing up.

Grill to desired doneness. Place on a clean plate and slice on the diagonal.

Luscious London Broil served with a Salad and microwaved Baked Potato – Yummy!
How sweet!

Enjoy!