Monday, September 26, 2016
Looking Forward- Zinnia Seeds!
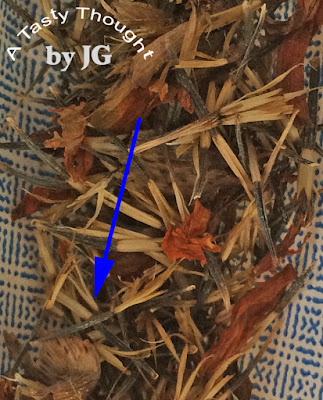
This past weekend some of the colorful Zinnia blossoms were snipped off from the plants. My plan has started. After these flowers dry, I'll save the seeds for next year's gardens. The bug? No, that's not part of the plan. :)
Enjoy!
Wednesday, September 14, 2016
Saving Marigold Seeds
 |
| 2nd Generation Marigolds (File Photo) |
All summer we've enjoyed our vibrant yellow & orange colored Marigolds. They add a beautiful touch of color to our yard. The plants with the orange flowers are 3rd generation from a single plant that my wonderful cute grandsons gave me for Mother's Day 2 years ago. I have every intention of keeping that original plant family going for more years. It's becoming a FuN tradition! Saving the seeds to plant again next spring is my plan! It is easy & does not take much time.
Saving Marigold Seeds
- Look for the dried blossoms on the Marigold plants (in lower left photo above).
- Break off the dried pods.
- Place in an open envelope to continue drying.
- After a month or so- when completely dry, separate all of the seeds from the pods.
- Place seeds in another envelope. Label/ date/ seal envelope.
- Store until next year!
 |
| Marigold Seeds |
 |
| 3rd Generation Marigolds- 2016 |
Thursday, September 1, 2016
~Peach Freezer Jam~
 |
| Peach Freezer Jam |
After purchasing them, the next step was placing the peaches in brown paper lunch bags (closing the tops) to ripen on my kitchen counter- 3 per bag. It took about 3- 4 days for my kitchen to have an aroma of peaches. After opening the bags, they were stored in the fridge. I could prep the jam!
Yesterday, I was ready. I read through my Helpful Hints for making Freezer Jam & found the needed supplies. Click here for Helpful Hints. The directions for preparing the Freezer Jam are located inside the box of Certo. Follow the directions, exactly!
The first step was preparing the Peaches.
To remove Peach skins:
- Bring a pot of cold water to Simmer on the stove.
- Carefully, using a slotted spoon, place each peach in the pot for about 45 seconds. (1- 2 at a time.)
- Then with the slotted spoon, remove to a paper towel lined plate.
- After the fruit cools, the skins are easy to remove.
After filling the 1 Cup containers with the jam & snapping on the lid, each container was labeled/ dated. They sat undisturbed on our Dining Room table for the required 24 hours. This afternoon the containers found a home in our freezer.
As you can see in the above photo, I've used these 1 Cup containers before for jams. My favorite shape is a circular shape, but they are no longer produced by Ziploc. This year my reused containers have a colorful blue label.
Three Cheers for New Jersey Peaches!!!
Do you prep & store Freezer Jams? They are just the best! So much better than the commercial jams, too!
Enjoy!
Yummy!
Labels:
Certo,
directions,
DIY,
easy recipe,
family,
favorite,
freezer,
jam,
peach,
Peaches
Subscribe to:
Comments (Atom)


