Sunday, February 26, 2017

Ah Yes, Color!

Welcome Sight!
Red Amaryllis
In the middle of January I was ready to work with the Amaryllis!  It was the potted bulb 2 of my cute grandsons gave us.  The color was a mystery.  Mysteries are good!  It was also a mystery if  I would see any beautiful anticipated flowers.  A YouTube video was very helpful. 

O.K., the lid was carefully removed from the pot.  The bulb was watered- not too much.  The pot was rotated:  90°- 180° every time.  The ever growing stem with a "bud" was staked- gently with yarn.  Suddenly the "bud" began to open & small red buds appeared.  I was on my way to see brilliant red color in the winter!  Woo hoo!

The buds opened.  The Amaryllis is watered.  The pot is rotated.  What a gorgeous sight in February!

Pollen & me have issues, so I also removed the pollen sacs.  I am planning on enjoying these bright red flowers for as long as  can!

After it flowers (with some TLC), I've learned that the bulb can be replanted at a later date.  Oh yes, brilliant red flowers again!  This is so similar to my Marigold plant!  Seeds are saved every year & planted the following spring!      

Enjoying the Amaryllis!
               

Monday, February 20, 2017

Butternut Squash Raisin Muffins

~Butternut Squash Raisin Muffins~
We have a few packages of Butternut Squash in our freezer!  Ah, just a very few.  It's the veggie that we purchase in autumn from Meadowbrook Farm.  After bringing the bushel home the next step is to steam/ mash/ package/ label/ freeze it to enjoy during the other months of the year.  Yesterday, while we were enjoying this yummy orange colored veggie during dinner I decided to save out 1/2 of a cup.  I had Butternut Squash Muffins on my mind.  The yummy muffins that most people think about & enjoy in autumn.  Why wait for autumn in 2017?  These light muffins with Raisins are also  flavored with Cinnamon, Nutmeg & Cloves.  They taste so good any time of year & during the winter they are a great treat.

Looking outside, the snow in our yard has certainly melted!  Streets & sidewalks are clear.  That makes taking the daily walk outdoors so easy!  After returning from the walk, the 
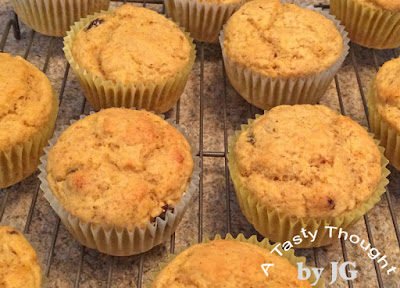
Butternut Squash Raisin Muffins were soon baking in the oven!  Yum!         

Butternut Squash Raisin Muffins
Oven:  400°F
Time:  20- 22 Minutes
Yield:  12 Muffins

Ingredients:
1 and 1/2 Cups Flour
1/2 Cup Sugar
2 teaspoons Baking Powder
1/2 teaspoon Salt
1/2 teaspoon Cinnamon
1/4 teaspoon Nutmeg
1/8 teaspoon Ground Cloves
2 Egg Whites (or 1 Whole Egg)
3/4 cup Soy Milk (can be 1%, 2% or Whole Milk)
1/4 Cup Olive Oil for baking & sauteing
1/2 cup Butternut Squash cooked & mashed 
1/4 cup Raisins

Method:
  1. Preheat oven to 400°F.
  2. Line muffin pan with liners.
  3. Combine the first 7 dry ingredients in a mixing bowl. Stir to mix.
  4. Separate Egg Whites & place in small bowl & beat with a fork. 
  5. Add Soy Milk & Olive Oil to small bowl. Combine.
  6. Add mashed Butternut Squash to liquid mixture, combine.
  7. Pour liquid ingredients into dry ingredients.
  8. Add Raisins.
  9. Mix all ingredients together until moistened.  Batter may be lumpy.
  10. Fill muffin liners.
  11. Bake 20- 22 Minutes in 400°F oven until muffins are lightly browned on top.
  12. Remove muffins from pan immediately.
  13. Cool on racks.
After these muffins cooled for about 10 minutes, suddenly 1 was gone from the rack!  You guessed it.  My Hubby walked into the kitchen.  :)

Will you be baking a batch of these muffins?

Enjoy!
Yummy!


Monday, February 13, 2017

"The Marriage License"

"The Marriage License"
at the Norman Rockwell Museum
It's a nice little road trip from our home to the Norman Rockwell Museum that's located in Stockbridge, MA.  Traveling west on the Mass Pike (I90) brings us into the Berkshires (Berkshire County).  With each visit to this fave place it's great to learn a little more about a well known American artist & his beautiful works!

"The Marriage License" is another beautiful painting in the museum's collection!  This was the cover for The Saturday Evening Post on June 11, 1955.  An excited young couple is happily filling out the paperwork for their marriage license.  In contrast, the Town Clerk is patiently waiting, looking off into the distance preoccupied with his thoughts.  The room has dark wood & objects while the young woman's yellow dress & the light coming in from the window lets us look into this room more easily.

This work is a favorite with many married/ engaged couples.  Many have their photo taken in front of it during their anniversary month.  Like we did this past July on our anniversary!

An Anniversary Photo

Happy Valentine's Day!!!
Enjoy!
            

Sunday, February 12, 2017

Creamy Cheesy Pie

Creamy Cheesy Pie
(File Photo)
ready to slice & serve
My mother- in- law introduced me to Creamy Cheesy Pie.  It was decades ago when Jim & I visited his parents in Florida.  Two weeks before arriving, I had prepared a cheesecake that took 2 hours to prepare.  After making the pie crust shell, the filling was prepared.  Then, the cheesecake was baked.  It tasted so delicious, but it was so time consuming.

On this particular visit to the sunny state I was introduced to a very easy dessert.  After dinner one night, we all enjoyed our dessert- Creamy Cheesy Pie.  It was served with a little whipped cream on top.  Oh, it was so good!  My MIL told me it was a "cinch" to make.  She was not kidding!!!  One 2- serving box of vanilla cook & serve pudding was prepared & it was combined with 8 ounces of Cream Cheese.  Then, the mixture was poured into a pre-made graham cracker crust.  Into the fridge it went to cool.  O.K. , now that is easy!!!  It's not only easy, it tastes so good!!! 

No, I never went back to preparing that other Cheesecake again.  ;) 

This is a dessert I make "every so often".  Cheesecake has always been a favorite dessert of mine.  Polish Cheesecake, Carrot Cheesecake & Key Lime Cheesecake are quite hard to resist in my book.  This one is too!!!

A Few Hints:
  •  My family uses 1% Milk, so I add 1 Tablespoon powdered milk into pot before making pudding.
  • I use Jell-O brand pudding mix, because I do not burn the pot when I use the Jell-O brand.  :)

  • My son has prepared a delicious Chocolate Creamy Cheesy Pie using chocolate pudding mix.    

Creamy Cheesy Pie


Ingredients:
(1) pkg. 2 serving cook & serve Vanilla Pudding Mix
(1) pkg. 8 oz. Cream Cheese
(2) Cups Milk
(1) Pre-made Graham Cracker Pie Shell 

Method:  
  1. Prepare Pudding according to package directions. 
  2. Place Cream Cheese in a medium bowl.
  3. Pour hot cooked Pudding over Cream Cheese and whisk until smooth.
  4. Pour mixture into Graham Cracker crust.  Smooth mixture to crust edges.
  5. Cool about 30 minutes.  Then, cover with plastic wrap. 
  6. Refrigerate overnight.
  7. Cut into slices.  Add whipped cream on top.
  8. Place berries on the side.
  9. Refrigerate remaining pie to enjoy again.  Yum!
I will be making this dessert on Monday afternoon.  Topped with a little Strawberry Freezer Jam & then whipped cream. Oh yum!!!

Will you be making one, too?  Easy + delicious!!!

Enjoy!
Yummy!

Thursday, February 9, 2017

~Quick Glance~

~Today's View~
at Noontime
It's February 9th!  It is winter and the light snowflakes keep falling today!  Schools are closed for the day in the northeast & the snowplow has visited my neighborhood already this AM.  It will return! Yesterday, our thermometer reading was 51°F.  Today is a totally different story.  There is no taking a walk outside for me.  Our handy dandy treadmill will be used!

But, what a beautiful view from any window in our home!

Enjoy!
      

Thursday, February 2, 2017

Slow Cooker Turkey Chili

Slow Cooker Turkey Chili
Super Bowl Sunday is approaching fast!  The day when viewing the commercials on t.v. is as much FuN as watching the game.  It's become a tradition here- enjoying a bowl of hot hearty Slow Cooker Chili on that day!  Slow Cookers/ Crock Pots are so handy here.  All the ingredients go into the pot & the small kitchen appliance does the cooking.  A meal in a pot!

If there are any portions remaining, Chili freezes very well.  Cool before placing in containers, label/ date & freeze.        

This year there's a little change up in my recipe.  Lean Ground Turkey replaces Ground Beef!

2 Helpful Hints
  • My Slow Cooker has a non-stick coating, so the Green Pepper chunks are added on the bottom of the pot first to prevent any too crispy Ground Turkey.  (Yes, once I had crispy meat on the bottom & this is how I prevent it from occurring again.)
  • I brown the Ground Turkey before placing in the Slow Cooker's pot to remove the fat. 

Slow Cooker Turkey Chili

 Ingredients:
1 lb. lean Ground Turkey
1 small Green Pepper, cut into small chunks
(1) 14.5 oz. can Diced Tomatoes, drained
(2) cans Red Kidney Beans (about 19 oz. each)
Chopped Onions (I use 1 Tablespoon dehydrated Onions.)
Chopped Parsley (I use 1 Tablespoon dehydrated Parsley.) 
2- 3 teaspoons Chili Powder
1/2 teaspoon Garlic Powder
1/2 teaspoon Oregano
(2) cans Tomato Sauce (15 oz. each)

Method:
  1. Spray nonstick cooking pot of Slow Cooker with PAM. 
  2.  Brown Ground Turkey in a frying pan.
  3.  Cut Green Pepper into chunks & place in cooking pot.
  4.  Add browned Ground Turkey.
  5.  Add drained Diced Tomatoes.
  6.  Drain Kidney Beans.  Rinse in cold water.  Drain again.
  7.  Place on top of Diced Tomatoes.
  8.  Sprinkle on desired amount of chopped Onions & chopped Parsley.
  9.  Then, sprinkle Chili Powder, Garlic Powder & Oregano on top.
  10.  Pour Tomato Sauce on top & spread evenly.
  11.  Place lid on top of Slow Cooker/ Crock Pot.
  12.  Set temperature to High for 2 and 1/2 hours.  Then, reduce to Medium for 1/2 hour. 
  13.  Stir before serving into bowls.
While you're adding the Turkey Chili ingredients to your grocery list for this weekend, add Fat Free Sour Cream & Rye Bread.  A dollop of Sour Cream on top of Chili is so good!  The Rye Bread is great for dunking!

Go Falcons!!!

Enjoy!
Yummy!